Before I get started, I want to be clear that this has been my first time ever doing pixel art. I'm more interested in talking about the tech than my (lack of) artistic skill.
Background
Everybody knows QR codes; even if they didn't before 2020, they do now. But for an extremely quick rundown, they're just a bunch of data encoded using pixels as binary 0s and 1s, with some extra stuff used for orientation and tracking so that scanners know how to find the code in a larger image, etc. They come in many different resolutions, from 21x21 all the way up to 177x177, with a total of 40 available code sizes. They mostly look like a square of random pixels.
No doubt, you've seen custom QR codes before; usually somebody slapping their company logo in the middle or something. The way this works is that QR codes set aside some of their pixels for error-correction data. If the code is damaged in some way (such as somebody slapping their company logo in the middle), the error correction data allows your scanner app to reconstruct the damaged part of the code so that it can scan anyway. It's fine, I'm not criticizing anybody who does that, it's just that it grosses me out super hard to deliberately corrupt some data and be like "Robot will get it." Maybe there's a better way?
Each size of QR code has a set capacity in terms of how many bytes of data it can carry. Most QR codes are not completely filling their capacity: for example, the smallest QR code (version 1) can fit at most 25 characters of text, but if you e.g. make a QR code that links to https://kbin.pub/, you've only used 17 characters. Even if you increase the error correction level, you still have space for 20 characters, which leaves three characters worth of data that are empty. To cope with this situation, QR codes need to be able to fill any free space with a bit of "meaningless" padding data.
Going by the QR code specification, this padding data is technically supposed to have a specific repeating sequence, but in practice, QR code scanner tools don't actually care what the padding values are--after all, it's just padding. That means we're finally getting to the fun part: what if we could arrange that padding in such a way that it forms a small piece of 1-bit pixel art? The result would be a customized QR code which has all of its data intact, without having to rely on error-correction like some feral animal.
Setup
@revk has created an app, simply called QR, which can perform this function, and can be built and operated from the Linux console. Personally, my Linux proficiency ranks at "I have used Linux before, no further questions please." Mostly, I just run Windows, ~~although my Wii U runs Linux~~. That said, if you're a pleb like me, modern Windows (10+) makes it pretty easy to use a virtual Linux machine. You can open the Microsoft Store and download a Linux distro to run like a Windows app. Personally, I use Debian, but these instructions should also work for any of the Ubuntu flavors. If you're already a Linux user, you probably know what you're doing. On Mac, I have no idea.
First, you'll need to set up your Linux user and passwords, which I won't cover here. After that, the following lines can be typed or pasted into the Linux console. As always, don't trust some Internet jerk telling you to paste things into the console. Except this once. Note that the line cd /mnt/c assumes that the Windows C:\ drive is where you want to do your QR code work. You can change the path as appropriate to your needs, e.g. in real life, I used cd /mnt/c/Coding/revk. Note that you can't cd to a directory without creating it first, but I'm not explaining all of that here. Let's go already!
First up, install the dependencies:
sudo apt-get update && sudo apt-get install build-essential git libpopt-dev libz-dev
Then, enter the super-user password you set up earlier. Eventually, you'll get a prompt like this:
Need to get 101 MB of archives.
After this operation, 361 MB of additional disk space will be used.
Do you want to continue? [Y/n]
At this point, press Enter/Return to continue, or don't if you've changed your mind. It will probably take a few minutes to complete these package installs, then you can go back to entering these commands:
cd /mnt/c
git clone --recurse-submodules https://github.com/revk/QR.git
cd QR
make
If everything has gone to plan, you now have a Linux executable called qr in your C:\QR directory (or wherever you chose instead). If you like, you can move that executable to somewhere more convenient to you, do what you want. As a quick test, let's make a sample QR code by typing/pasting something like this into the console. Make sure you include the ./ on the front.
./qr "Hello world!"
Ideally, this will have printed a QR code directly into the Linux console which looks something like this:
█████████████████████████████
█████████████████████████████
█████████████████████████████
█████████████████████████████
████       █     █       ████
████ █████ ██ █ ██ █████ ████
████ █   █ ██  ███ █   █ ████
████ █   █ ██   ██ █   █ ████
████ █   █ ███ █ █ █   █ ████
████ █████ ████  █ █████ ████
████       █ █ █ █       ████
████████████     ████████████
████  █  █ ██  █ █ █████ ████
██████ ██ █ ████  ███  ██████
████ █ ██  ██  ██ ████   ████
████    ███     █ █ ██ ██████
█████  █ █  ██ █████  █ █████
████████████ ███      █  ████
████       ██  █   █ █ ██████
████ █████ ███     █   █ ████
████ █   █ █  █  ██ █ █ █████
████ █   █ █    █  ██████████
████ █   █ ███           ████
████ █████ █   █ █       ████
████       █ ██    ██████████
█████████████████████████████
█████████████████████████████
█████████████████████████████
█████████████████████████████
If not, I guess start regretting you ever read this thread.
Example
Now that you have the tool set up, it's time to start making pixel art for it. You enter the padding as plain text, like kind of janky ASCII art. You can pass it in as a console argument directly, but I find it easier to do it using a text file. For example, here's a text file I used to make one of my QR codes. I saved this file to the same folder as the qr executable for ease-of-access. For reference, Xs are black pixels, .s are white pixels, and (spaces) mean for the tool to handle filling those padding areas. Note that RevK's tool expects this file to have Unix line endings (LF), not Windows CRLF. Windows line endings are treated as black pixels, so they will interfere with your art.
mastodon.txt
  ..............
 ................
....XXXXXXXXXX....
...XXXXXXXXXXXX...
..XXX...XX...XXX..
..XX..........XX..
..XX..XX..XX..XX..
..XX..XX..XX..XX..
..XX..XX..XX..XX..
..XX..XXXXXX..XX..
..XX..XXXXXX..XX..
..XXXXXXXXXXXXX...
...XXXXXXXXXXX....
...XXXX..........
 ...XXXXXXXX....
 .....XXXXXX..
  ............
    ..........
Then, you can create your QR code with a command like this:
./qr -v 5 --mm=4 --random https://joinmastodon.org --png --right --overlay=@mastodon.txt --outfile=mastodon-qr.png
To briefly explain these arguments
-v 5: use a QR code version (size) of 5 (37x37 pixels)--mm=4: upscale the result 4x--random: fill any "unused" padding with random datahttps://joinmastodon.org: the payload when you scan the code--png: save the file as a PNG--right: rotate the code to the right--overlay=@mastodon.txt: use the padding layout stored in mastodon.txt--outfile=mastodon-qr.png: save the file as mastodon-qr.png
You can get a full list of the possible arguments with the following:
./qr -?
Canvas sizes
An extremely useful argument to use when figuring out your canvas size is to replace --png with --png-colour. This will output your QR code overlaid with colors to indicate which areas are data (blue), padding (green) and red (error correction). Also remember that depending on the orientation of your artwork, you may want to change the code rotation with --up, --down, --left or --right.
The size of the padding area will vary based on a) the length of your payload and b) the code version (1-40). Try to keep your payloads short, and use a QR version of about 5 (37x37 pixels). If you don't set a code version manually, the tool will generate as small a code as possible for your payload, which is not conducive to pixel art. In my experience, version 5 is the ideal compromise of canvas size and code readability. For reasonably short URLs like a bare domain or e.g. link to a social media profile, a version 5 code should net you at least a 16x16 pixel area for your pixel art to inhabit. Version 6 is larger (total size of 41x41 pixels), but the padding is intermingled with the encoded data, so it's not really going to give you one contiguous canvas to work with, making it sort of break-even against version 5 but (very) slightly harder to scan. You might be able to find a use for it, though.
Version 7 and above place alignment blocks (3x3 blocks of hardcoded squares) all over the code to make it easier for scanners to orient themselves, but these are going to infringe on your canvas as well. If you really want to push out the boat, you can use a massive version 40 code to get a giant canvas, but nobody wants to scan those awful hogging messes in real life, and you'll basically be refusing people who use budget smartphones, etc. because they can't reliably focus and resolve such large codes with their cheaper camera sensors. Plus, you'll have like 30 alignment blocks to either work around or try to incorporate into your art.
Color
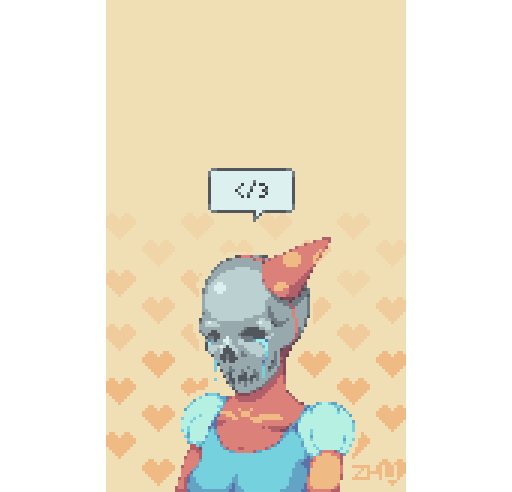
All right, earlier in the thread, I said we'd be creating 1-bit pixel art, but in practice I've hideously violated that restriction in all but one of my examples (the Matrix logo). While you can set your light and dark colors in RevK's tool, this kind of color fudging is not something it supports or intends; I've just gone in and hand-painted in some extra color to try to make things pop a bit more. I've basically tried to keep sort of within a luminance range to make sure the colors still read as "black" and "white" even though they sometimes vary by a lot in hue (e.g. the Jack-o-Lantern with its yellows, oranges and purples).
Credits
Obviously, the bulk of the credit here belongs to @revk for developing the tool I used here.
I will also credit Igara Studio for the Aseprite logo used in one of my examples, and Brandon James Greer for his monkey avatar in another (I will also note that both codes when scanned lead to the aforementioned links). Lastly, the MacPaint icon is a modification of a graphic included in legacy versions of Apple's MacPaint for Classic Mac computers.
PS
Hi, threadiverse! This was originally posted to kbin.social while federation was down. Apologies to kbeans who already saw it, but I figured it was worth reposting now that we're all connected again.


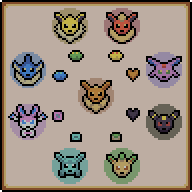
 This is something I made from a larger idea. It was a very fun idea, that a friend did implement his own version but I had a different sketch..


